A “Finsta” is a term used to describe a fake Instagram account that people create to share more private or personal content with a select group of people, often without the scrutiny of a larger audience. While a Finsta is meant to be more low-key, it still functions like a regular Instagram account, allowing you to share stories, posts, and interact with followers. If you’re looking to create a Finsta account, here’s a quick tutorial on how to do it.
1. Create a New Instagram Account
The first step in creating a Finsta account is to set up a completely new Instagram account. While it might be tempting to use your existing account, having a separate account will give you the privacy and control you need for your Finsta.
Steps to Create a New Instagram Account:
- Download the Instagram app from the App Store (iOS) or Google Play (Android) if you haven’t already.
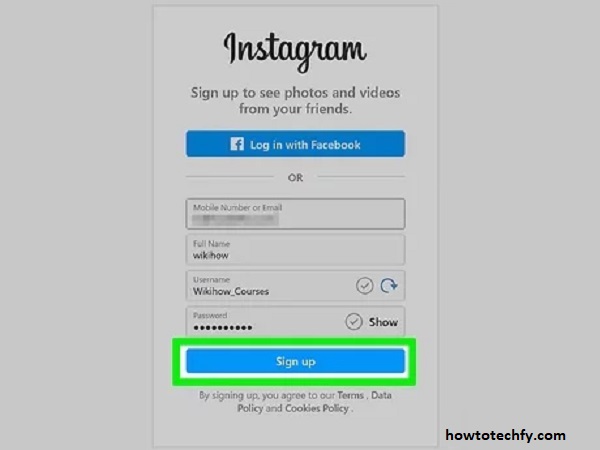
- Open the app and click on the “Sign Up” button.
- Enter your email address or phone number. If you’re creating a Finsta account, you may want to use a new email address or phone number that is not linked to your main Instagram account for added privacy.
- Create a username for your Finsta. This can be anything you like, but remember, it’s usually better to choose a name that doesn’t directly link to your main account.
- Choose a password that’s unique to this account.
- After filling in the necessary details, click on “Sign Up”. You may be asked to verify your email or phone number.

Once your account is created, you can set it up by adding a profile picture, bio, and other personal details. Make sure you keep these minimal or private, as a Finsta is typically intended to be a low-profile account.
2. Set Your Finsta Account to Private
One of the most important steps when creating a Finsta is to keep your account private. This ensures that only the people you approve can view your content and follow you. Keeping your account private protects you from strangers finding and viewing your posts.
Steps to Set Your Account to Private:
- Go to your profile by tapping on your profile icon in the lower-right corner of the Instagram app.
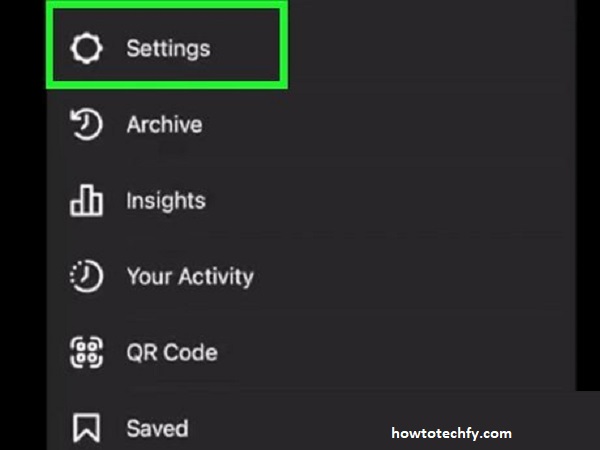
- Tap the three horizontal lines (hamburger menu) in the top-right corner of your profile page.
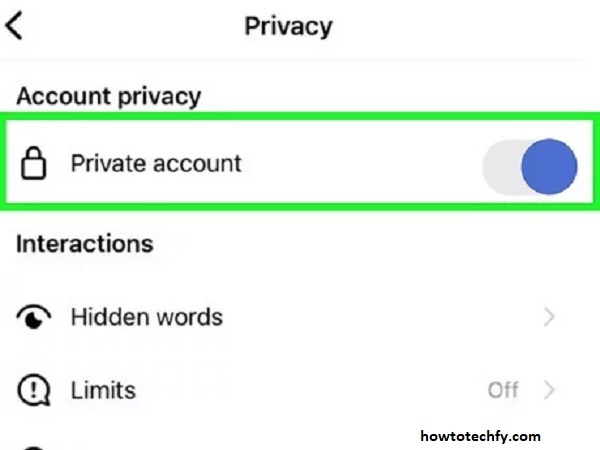
- Select Settings > Privacy.
- Toggle the Private Account option to on.

Once your account is private, only your approved followers will be able to see your posts and Stories. This adds a layer of privacy to your Finsta account.
3. Limit Who Can Follow You
Since the purpose of a Finsta is usually to share content with a small, trusted group, you can further control who can follow you by either approving followers or blocking certain users.
Steps to Manage Followers:
- If you receive a follow request from someone you don’t want to be friends with on your Finsta, you can choose to ignore or decline the request.
- If you already have followers on your Finsta who you want to remove, go to their profile, tap the three dots in the top-right corner, and select Remove Follower.

You can also manually add close friends and family to your Finsta by sharing your new account username with them. Keep in mind that it’s a good idea to not add people you don’t trust or who might share your private content with others.
4. Customize Your Finsta Content and Privacy Settings
Your Finsta account should be used to share content that is more private and unfiltered. Whether it’s funny posts, casual selfies, or personal updates, you want to feel comfortable posting freely. Instagram offers a variety of features that can help protect your privacy and curate your content accordingly.
Tips for Customizing Your Finsta:
- Stories Settings: To keep certain content private, you can hide your stories from specific people. To do this, go to your Story settings and tap on Hide Story From and select the users you want to hide it from.
- Close Friends: Instagram has a feature that allows you to share Stories with a select group of people called Close Friends. This is perfect for sharing more personal moments without showing everything to everyone.
- Direct Messages: Since a Finsta account is often used to communicate with a smaller group, feel free to use Instagram’s Direct Message feature to chat privately with trusted individuals.

Lastly, remember that a Finsta account is meant to be a place where you can share unpolished content. Don’t feel the need to worry about likes or follows — the focus should be on keeping things authentic and low-maintenance.
Conclusion
Creating a Finsta account on Instagram is a simple process that involves setting up a new account, adjusting privacy settings, and tailoring content to a small, trusted group. By keeping your account private, limiting who can follow you, and using features like Close Friends, you can maintain a sense of privacy and freedom while enjoying Instagram without the pressure of a public profile. Whether you’re sharing behind-the-scenes moments, memes, or personal updates, your Finsta can be your space to post without the worries of a larger audience.

