If you’re a Windows 11 user and own an iPhone, you may want to connect your devices for transferring files, syncing data, or using features like iMessage and FaceTime on your computer. While Apple’s ecosystem is typically designed to work best with macOS, there are several easy ways to link your iPhone to a Windows 11 PC. Below are four efficient methods to connect your iPhone to Windows 11.
1. Using iTunes for File Management and Syncing
One of the most traditional and reliable ways to connect your iPhone to Windows 11 is through iTunes, Apple’s official software for syncing data between your iPhone and a Windows computer.
Steps:
- Install iTunes: Start by downloading and installing the latest version of iTunes from the Microsoft Store or the official Apple website.
- Connect your iPhone: Plug your iPhone into your PC using a USB cable.
- Trust the Device: On your iPhone, a prompt will ask if you trust this device. Tap Trust, and enter your device passcode if necessary.
- Sync Data: Open iTunes on your Windows PC. Your iPhone should appear under the “Devices” section. From here, you can sync music, photos, contacts, and more between your devices.

iTunes also allows you to manage backups, update iOS, and restore your device, making it an essential tool for iPhone management on Windows 11.
2. Using iCloud for Seamless Cloud Syncing
If you prefer not to physically connect your iPhone to your Windows 11 device, using iCloud is an excellent alternative. iCloud is Apple’s cloud service that allows you to access your photos, files, and other content on both your iPhone and your Windows PC.
Steps:
- Install iCloud on Windows: Download the iCloud for Windows app from the Microsoft Store or the Apple website and install it.
- Sign In: Open iCloud and sign in with your Apple ID.
- Enable Syncing: Choose the features you want to sync, such as Photos, iCloud Drive, Mail, Contacts, and Calendars.
- Access Content: Once syncing is enabled, you can access your iCloud content from Windows File Explorer, or you can use the iCloud website to manage files, photos, and more.
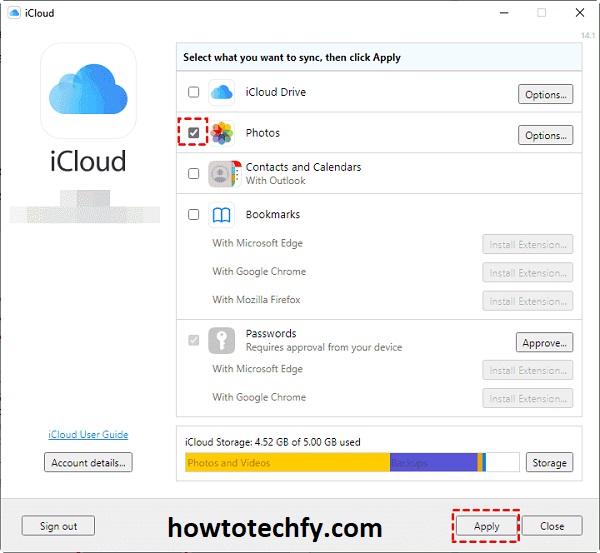
This method allows for a seamless cloud-based experience, making it easy to keep your data synchronized without physical cables.
3. Using the Windows 11 Phone Link App
Windows 11 comes with a feature called Phone Link (formerly Your Phone) that allows users to connect their Android or iPhone to a Windows PC wirelessly. Although Phone Link was originally designed for Android, it now offers limited support for iPhones.
Steps:
- Install the Phone Link app: Make sure the Phone Link app is installed on your Windows 11 PC. It is pre-installed, but you can download it from the Microsoft Store if needed.
- Install the Link to Windows app on iPhone: Download the Link to Windows app from the App Store and install it on your iPhone.
- Pair the Devices: Open the Link to Windows app on your iPhone, sign in with your Microsoft account, and follow the on-screen instructions to pair your devices.
- Use Phone Link: Once connected, you can access messages, notifications, and other data directly on your Windows 11 PC. However, iPhone functionality may be limited compared to Android devices.
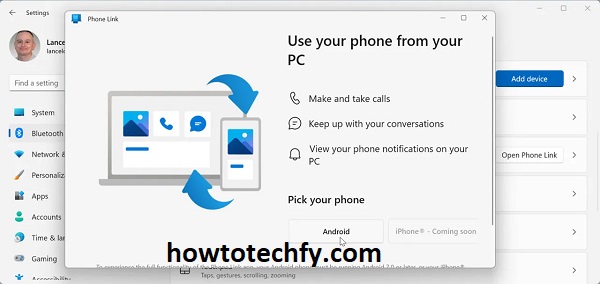
This method provides some basic connectivity, such as notifications and texting, but isn’t as robust as syncing with an Android phone.
4. Using Third-Party Apps for File Transfer
For users who need to transfer files between an iPhone and a Windows 11 PC, third-party apps can offer a quick and efficient solution. Apps like iMazing, WinX MediaTrans, and CopyTrans provide file transfer services between iPhone and Windows.
Steps (using iMazing as an example):
- Download iMazing: Go to the official iMazing website, download, and install the software on your Windows 11 PC.
- Connect your iPhone: Plug your iPhone into your PC using a USB cable.
- Transfer Files: Open iMazing, and it will detect your iPhone. You can then choose the type of file you want to transfer (e.g., music, photos, contacts, etc.) and transfer it to your computer.
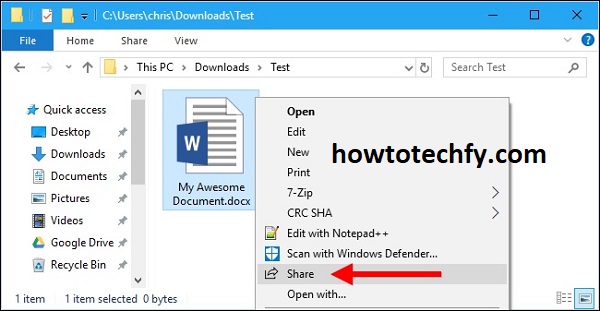
Third-party apps are often preferred for their additional features, such as the ability to transfer music, videos, and apps between devices. Some apps also support wireless transfers.
Frequently Asked Questions (FAQs) About Connecting iPhone to Windows 11
1. Do I need iTunes to connect my iPhone to Windows 11?
No, iTunes is not mandatory, but it is one of the most common ways to connect your iPhone to Windows 11 for tasks like syncing data, backing up, or managing music and videos. However, you can also use iCloud or third-party apps if you prefer not to install iTunes.
2. Can I use iCloud to transfer files between my iPhone and Windows 11?
Yes, you can use iCloud for syncing files such as photos, contacts, calendars, and documents. By installing iCloud on your Windows 11 PC, you can easily access your iCloud content directly through File Explorer or the iCloud website. This method does not require a USB cable.
3. How can I send and receive texts from my iPhone on Windows 11?
To send and receive texts from your iPhone on Windows 11, you can use the Phone Link app. Although it offers limited support for iPhones, it allows you to view notifications and send texts. For more comprehensive features, third-party apps like iMazing or CopyTrans may offer better functionality.
4. Are there any wireless methods to connect my iPhone to Windows 11?
Yes, you can use iCloud for wireless syncing of data and Phone Link for viewing notifications and sending messages. However, for larger file transfers, such as photos or videos, a wired connection via USB cable is generally faster and more reliable.
5. What is the Phone Link app, and does it work with iPhones?
The Phone Link app is a feature built into Windows 11 that allows users to connect their phones to their computer. While it was originally designed for Android devices, limited support for iPhones is now available. With an iPhone, you can sync messages, notifications, and calls but may not be able to access all features available with Android phones.
6. Can I use third-party apps for more advanced file transfers?
Yes, third-party apps like iMazing, WinX MediaTrans, and CopyTrans are great alternatives for transferring files like music, photos, and videos between your iPhone and Windows 11 PC. These apps often provide features that go beyond iTunes, such as wireless transfers and more granular control over the files on your iPhone.
7. How do I transfer photos from my iPhone to Windows 11?
To transfer photos from your iPhone to Windows 11, you can use iCloud, File Explorer, or third-party apps like iMazing. Using File Explorer, simply connect your iPhone via USB, open the “This PC” folder, find your iPhone under “Devices and drives,” and copy the photos from the “DCIM” folder to your PC.
8. Is it safe to use third-party apps to connect my iPhone to Windows?
While third-party apps like iMazing and WinX MediaTrans are generally safe to use, it’s always important to download them from reputable sources to avoid malicious software. Always read reviews and check for official support to ensure the app’s legitimacy and compatibility with your device.
9. Can I use my iPhone to control Windows 11?
While iPhones cannot directly control a Windows 11 PC by default, there are third-party apps like TeamViewer or AnyDesk that allow remote access. These apps let you control your PC from your iPhone, which can be useful for accessing files or performing tasks remotely.
10. Why isn’t my iPhone showing up on Windows 11?
If your iPhone is not showing up on your Windows 11 PC, ensure that:
- You have the latest version of iTunes installed.
- Your iPhone is unlocked and trusts the computer.
- You are using a working USB cable and port.
- The “Apple Mobile Device Support” is installed on your PC.
Conclusion
Connecting your iPhone to a Windows 11 computer doesn’t have to be complicated. Whether you choose to use iTunes for syncing, iCloud for cloud storage, Phone Link for basic functionality, or third-party apps for file transfers, each method offers unique benefits. Choose the one that best fits your needs to ensure a smooth experience between your iPhone and Windows 11.

