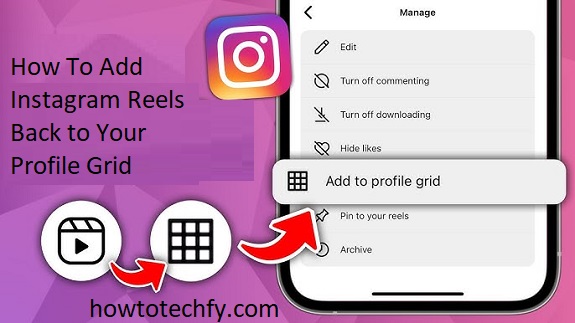
Instagram Reels have become an essential feature for users and creators alike, offering an opportunity to share engaging and creative video content. Initially, Reels would appear in a dedicated tab on your Instagram profile, but many users prefer having their Reels displayed on their main grid. Fortunately, Instagram allows you to add Reels back to your profile grid, giving your followers easy access to your best videos. Here are three easy ways to add Instagram Reels back to your profile grid.
1. Repost Your Instagram Reel to Your Profile Grid
The simplest way to add a Reel back to your profile grid is by reposting it. If you’ve already posted the Reel and it’s not on your grid, you can follow these steps to repost it to your profile:
Step-by-Step Process to Repost a Reel
- Go to the Reel: Open the Instagram app and navigate to your profile. Then, tap the Reels icon to view all of your Reels.
- Select the Reel: Scroll through your Reels and select the video you want to add to your grid. Open the Reel to view it in full-screen mode.
- Repost the Reel:
- Tap the three-dot menu (•••) on the bottom-right corner of the Reel.
- Select “Share” and then tap “Add to Your Feed”. This will add the Reel to your main profile grid.
- Edit and Caption: Once you choose to add it to your feed, you can edit the caption, tags, and any other details you want to update. Make sure to add relevant hashtags or geotags to increase the visibility of your Reel.
- Post the Reel: After making any adjustments, tap “Share”. Your Reel will now be visible on your profile grid, just like a regular post.

This method essentially allows you to repurpose the same content, making it available on both the Reels tab and your main profile grid.
2. Create a New Post from Your Reel
If you don’t want to repost your Reel as-is but want to make it appear on your profile grid, you can create a new post using the Reel as the source. Here’s how:
Step-by-Step Process to Create a Post from Your Reel
- Download the Reel: If you don’t have the Reel saved to your phone, start by downloading it from your Instagram profile:
- Open your profile and tap on the Reels tab.
- Select the Reel you want to add to your grid.
- Tap the three-dot menu (•••) and select “Save” to download the video to your phone.
- Create a New Post:
- After downloading the video, go to your Instagram home feed and tap the “+” button to create a new post.
- Select “Post”, then choose the saved Reel from your gallery.
- Edit the Post: You can crop the video, adjust filters, and add a caption as usual. While the video was originally posted as a Reel, you’re now turning it into a regular post, so feel free to make any changes.
- Share the Post: Once you’re happy with the editing, tap “Share”. This will add the Reel as a regular post to your profile grid.

While this method involves saving and reposting the video, it offers more customization options and lets you treat the content as a new post.
3. Use Instagram’s Archive Feature to Add Reels Back to Your Grid
If you’ve previously shared a Reel on your profile but it’s no longer showing on your grid, you can use Instagram’s archive feature to bring it back. The archive allows you to hide posts (including Reels) from your profile while keeping them stored on Instagram. You can unarchive a post at any time to restore it to your grid.
Step-by-Step Process to Unarchive and Add Your Reel Back to the Grid
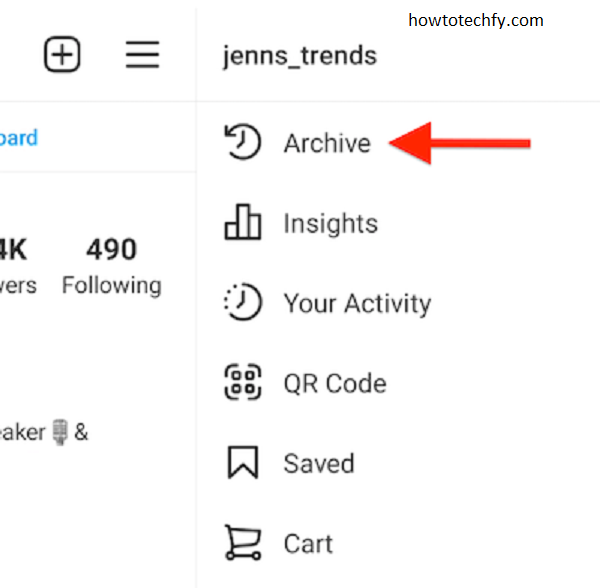
- Access Your Archive: Go to your Instagram profile and tap the three lines in the top-right corner to open the menu. Select “Archive”.
- Select the Post Archive: At the top, you will see options for “Stories Archive” or “Post Archive”. Tap on “Post Archive” to view all your archived posts, including Reels.
- Find the Reel: Scroll through the archived posts to find the Reel you want to add back to your profile grid.
- Unarchive the Reel: Tap on the Reel, and then tap the three-dot menu (•••) in the top-right corner of the post. Select “Show on Profile”. This will restore the Reel to your profile grid.

By unarchiving the Reel, it reappears on your profile as if it were a new post, without needing to repost or re-upload.
FAQs
1. Can I add an Instagram Reel back to my profile grid after it’s been posted?
Yes, you can add an Instagram Reel back to your profile grid by reposting it, creating a new post from the Reel, or using Instagram’s archive feature to unarchive the post and restore it to your grid.
2. How do I repost an Instagram Reel to my grid?
To repost a Reel to your grid, go to the Reel, tap the three-dot menu (•••), select “Share”, and then tap “Add to Your Feed”. This will add the Reel back to your main profile grid.
3. Can I edit the Reel before reposting it to my grid?
Yes, before reposting a Reel, you can edit its caption, add tags, and make any other changes you wish. However, you can’t edit the video itself (such as trimming it) once it’s posted as a Reel, so you may need to repost it as a new post if you want to edit the video.
4. How do I create a new post from a Reel?
If you don’t want to repost a Reel as-is, you can download it to your phone, create a new post by selecting the downloaded video, and then share it to your profile as a regular post.
5. What is the Instagram Archive feature, and how does it work for Reels?
The Instagram Archive feature lets you hide posts (including Reels) from your profile while keeping them stored on Instagram. You can unarchive any post at any time to restore it to your profile grid.
6. How do I unarchive a Reel to add it back to my grid?
To unarchive a Reel, go to your Instagram profile, tap the three lines in the top-right corner, and select “Archive”. In the “Post Archive” section, find the Reel you want to add back, tap on it, and select “Show on Profile”. The Reel will then be restored to your profile grid.
7. Can I add multiple Reels back to my profile grid at once?
While Instagram doesn’t allow bulk reposting or unarchiving of Reels, you can manually repost or unarchive each Reel you wish to add to your grid. Simply repeat the process for each one individually.
8. Will reposting or unarchiving a Reel affect its engagement?
Reposting or unarchiving a Reel won’t affect its past engagement, such as views, likes, or comments. However, it might receive additional engagement after being added back to your profile grid, depending on how your audience interacts with it.
9. Can I delete a Reel from my profile grid after reposting it?
Yes, you can delete a Reel from your profile grid at any time. To do so, go to the Reel, tap the three-dot menu (•••), and select “Delete”. This will remove the Reel from both your grid and your Reels tab.
10. Is it better to repost Reels or create new posts from them?
It depends on your goals. Reposting a Reel will allow you to bring attention to the content without having to re-edit it. Creating a new post from a Reel can give you more control over edits and captions but may require additional steps.
Conclusion
Adding Instagram Reels back to your profile grid is a straightforward process, whether you choose to repost, create a new post from the Reel, or unarchive an old post. These three easy methods offer flexibility, allowing you to feature your Reels prominently on your profile and ensure your content gets the attention it deserves. Whether you’re looking to refresh your profile or maximize the visibility of your videos, these methods will help you keep your content front and center.

