Installing a CPU and heatsink may seem like a daunting task, but with the right approach, it can be straightforward and satisfying. Whether you’re building a custom PC or upgrading your system, this essential guide will walk you through the process and help you avoid common mistakes that could lead to performance issues or even damage your components.
1. Preparation is Key: Gather Tools and Components
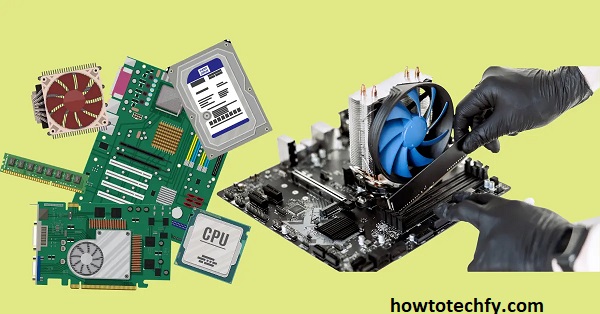
Before diving into the installation process, it’s crucial to prepare your workspace and gather all necessary tools and components. Here’s what you’ll need:
- CPU (Processor)
- Heatsink/Fan assembly
- Thermal paste (if not pre-applied)
- Screwdriver (appropriate size)
- Anti-static wristband (optional but recommended)
- Motherboard (if installing the CPU into a new build)

Take precautions to avoid static discharge, which can damage your delicate computer parts. An anti-static wristband is an excellent investment, as it grounds you and prevents static electricity from transferring to the motherboard.
2. Installing the CPU: A Gentle Touch is Essential
The first step in the process is installing the CPU into the motherboard. Follow these steps carefully to avoid damaging your components:
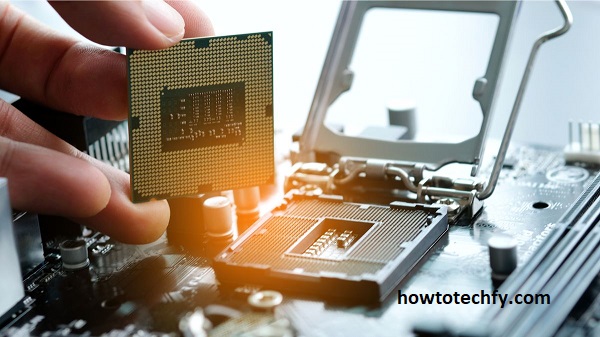
- Open the CPU socket: Most modern motherboards have a lever or latch that secures the CPU in place. Gently pull this lever to open the socket.
- Align the CPU correctly: CPUs and sockets are keyed to fit in only one way, so make sure you line up the notches on the CPU with the corresponding points on the socket. Never force the CPU into place.
- Install the CPU: Once aligned, gently lower the CPU into the socket. It should fit snugly without any force. After it is seated, close the socket latch to secure the CPU in place.

Common Mistake: Forcing the CPU into the socket can bend the pins or cause permanent damage. Always check the alignment before attempting to insert it.
3. Applying Thermal Paste and Installing the Heatsink
Thermal paste is essential for efficient heat transfer between the CPU and the heatsink. Here’s how to apply it correctly:
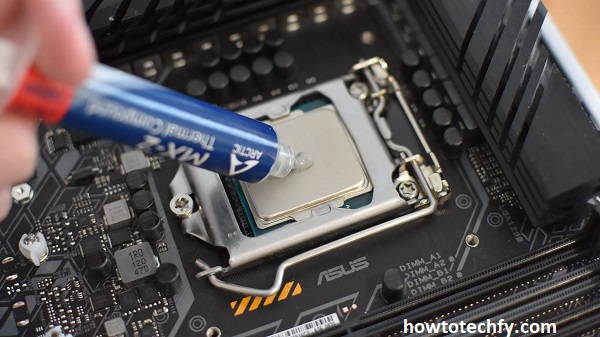
- Apply a small amount of thermal paste: Place a small, pea-sized dot of thermal paste in the center of the CPU. Too much paste can cause it to spill over the edges, while too little can result in poor thermal performance.
- Install the heatsink: Most heatsinks come with their own mounting brackets or clips that need to be aligned with the motherboard’s socket. Carefully place the heatsink over the CPU, ensuring it’s seated evenly. Apply slight pressure to secure it.
- Tighten screws evenly: If your heatsink has screws, tighten them evenly in a criss-cross pattern to ensure proper pressure distribution. Avoid overtightening, as this can damage the CPU or motherboard.

Common Mistake: Not applying enough thermal paste can lead to poor cooling, while too much can cause it to spill onto the motherboard. A small, even amount is all that’s needed.
Final Check and Power On
Before closing your case and powering on your PC, it’s important to double-check your work. Ensure that all connections are secure and that the CPU and heatsink are properly seated. Once everything is in place, you can connect your power cables and start the system.
During boot-up, check the temperature of your CPU through BIOS or using software. If the temperature is too high, you may need to reapply the thermal paste or ensure the heatsink is properly attached.
FAQs: Installing a CPU and Heatsink
1. Do I need to apply thermal paste every time I install or replace a CPU?
Yes, it’s crucial to apply thermal paste each time you install or replace a CPU, especially if you’re removing the heatsink. Over time, the paste can degrade, and reapplying ensures optimal heat transfer between the CPU and heatsink, preventing overheating.
2. How much thermal paste should I use?
A small, pea-sized amount in the center of the CPU is usually sufficient. When you install the heatsink, the pressure will spread the paste evenly across the surface. Avoid using too much, as it can spill over the edges and cause unwanted mess, while too little can lead to inadequate cooling.
3. What happens if I don’t install the heatsink correctly?
If the heatsink is not installed properly, the CPU could overheat, leading to instability or potential damage to your components. Overheating can cause the system to shut down automatically or lead to long-term damage, reducing the lifespan of your CPU and motherboard.
4. Can I reuse thermal paste?
It is generally not recommended to reuse thermal paste. Over time, the paste can dry out, lose its effectiveness, and even create uneven surfaces. If you plan to remove and reinstall your heatsink, it’s best to clean off the old paste and apply a fresh layer.
5. Should I worry about CPU pin alignment?
Yes, ensuring the CPU is correctly aligned with the socket is vital. If the pins (on older CPUs with pins) or the pads (on modern CPUs) are misaligned or bent, it can cause the CPU to not function properly or even result in permanent damage. Always double-check alignment before gently inserting the CPU.
6. What if my heatsink doesn’t have screws or clips?
Some heatsinks, especially stock coolers, come with a mounting mechanism that doesn’t require screws or clips. Instead, they might use a spring-loaded system or a bracket that slots into the CPU socket. Always refer to the manufacturer’s instructions for the correct installation procedure.
7. Is it necessary to use an anti-static wristband?
While not absolutely required, using an anti-static wristband is highly recommended when working with sensitive computer components. It helps prevent static discharge, which can damage electronic parts like the motherboard, CPU, or RAM.
8. How do I know if my CPU is overheating?
You can monitor CPU temperature through your computer’s BIOS or by using software tools like HWMonitor or CoreTemp. If the temperature is excessively high (usually over 85°C), it may indicate that the CPU cooler is not installed properly, the thermal paste is insufficient, or there is inadequate airflow in the system.
9. Can I install a heatsink without a fan?
Yes, you can install a heatsink without a fan, but the cooling performance will be limited. Heatsinks rely on passive heat dissipation, and without active airflow (a fan), they may not be effective enough, especially for high-performance CPUs. Most users opt for heatsinks with fans to ensure optimal cooling.
10. What should I do if my CPU socket latch is stuck?
If the CPU socket latch is stuck, do not force it. Gently try to wiggle or move it to release the tension, or consult the motherboard’s manual for specific instructions. Forcing the latch could damage the socket, rendering it unusable.
Conclusion
Installing a CPU and heatsink is an essential skill for any PC builder, and with careful preparation and attention to detail, you can avoid common mistakes that could lead to problems down the road. Always handle your components gently, apply thermal paste correctly, and ensure proper seating of the heatsink for optimal cooling and performance. By following these steps, you’ll be ready to power up your system with confidence.

